Why scan instead of taking a photo?
When you need to fax a paper document, it is tempting to snap a photo with your phone camera. But a regular photo is not the same as a scan. Photos include perspective distortion from the camera angle, uneven lighting and shadows, background clutter like the desk or your fingers, and no contrast enhancement. So fine print can be hard to read.
The built-in document scanner in iPhone Notes fixes all of these problems automatically. It detects the document edges, corrects the perspective so the page looks perfectly flat, enhances the contrast for crisp black-on-white text, and combines multiple pages into a single PDF. The result looks like it came from a real flatbed scanner, and it takes less than a minute.
Step 1: Open Notes and start a scan
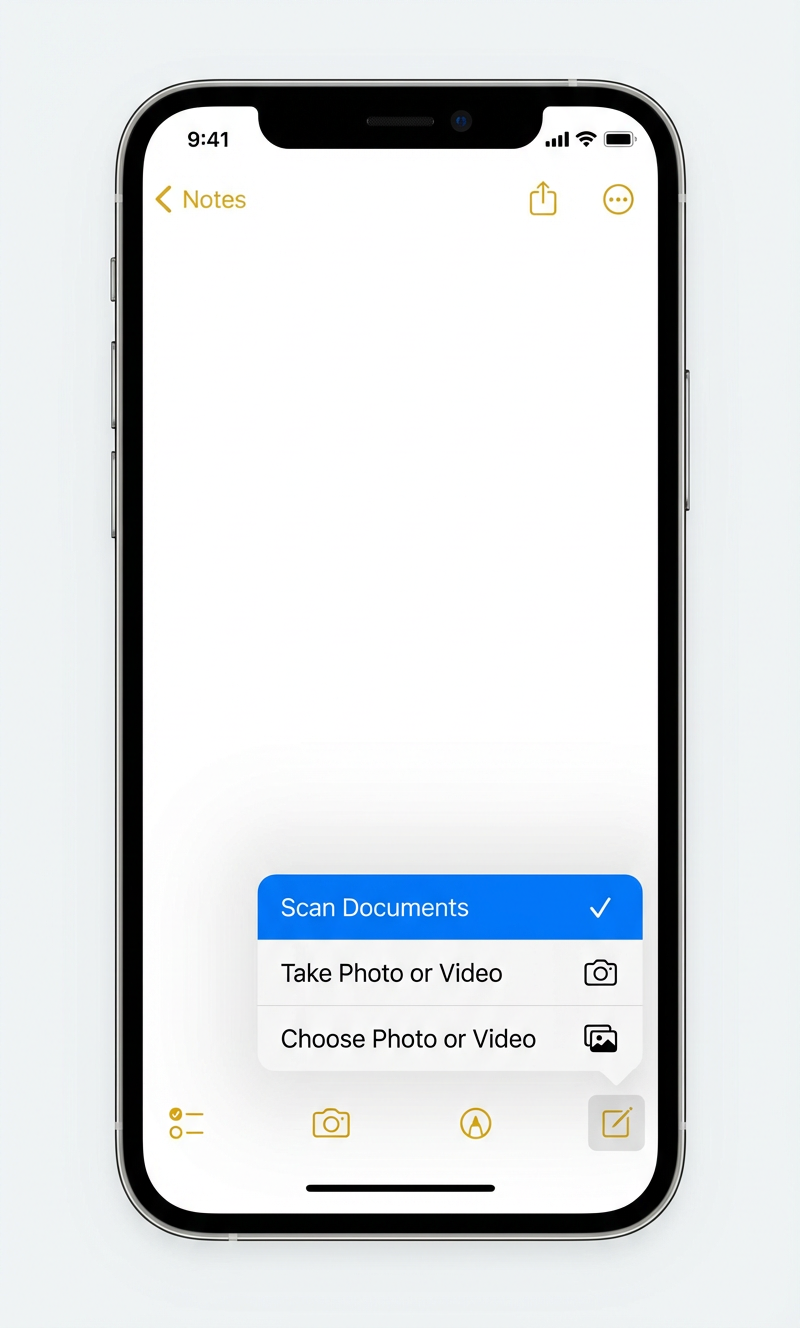
Open the Notes app on your iPhone (the yellow notepad icon). Create a new note or open an existing one. Tap the camera icon in the toolbar, then choose Scan Documents.
- Make sure you choose Scan Documents: not "Take Photo or Video". Only the scanner applies automatic edge detection, perspective correction, and contrast enhancement.
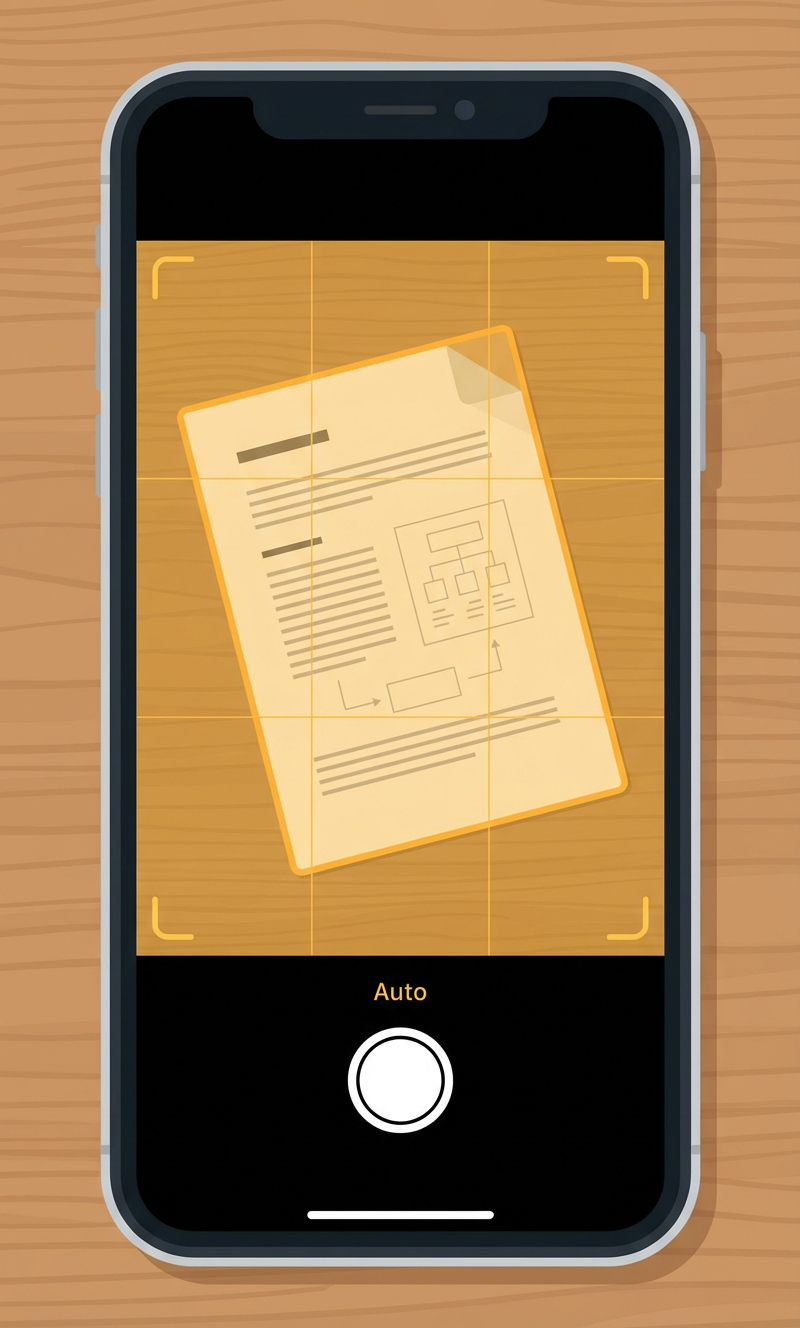
Step 2: Point at your document
The camera viewfinder opens in scanning mode. Place your document on a flat, contrasting surface (e.g. a dark desk for white paper). The scanner automatically detects the document edges. You will see a yellow highlight over the detected area.
- Auto mode (the default) captures the page as soon as it detects stable edges. You can also tap the shutter button manually.
- Hold your phone roughly parallel to the document. Do not worry about perfect alignment. The scanner corrects skew and perspective automatically.
- Ensure good, even lighting. Avoid strong shadows across the page.
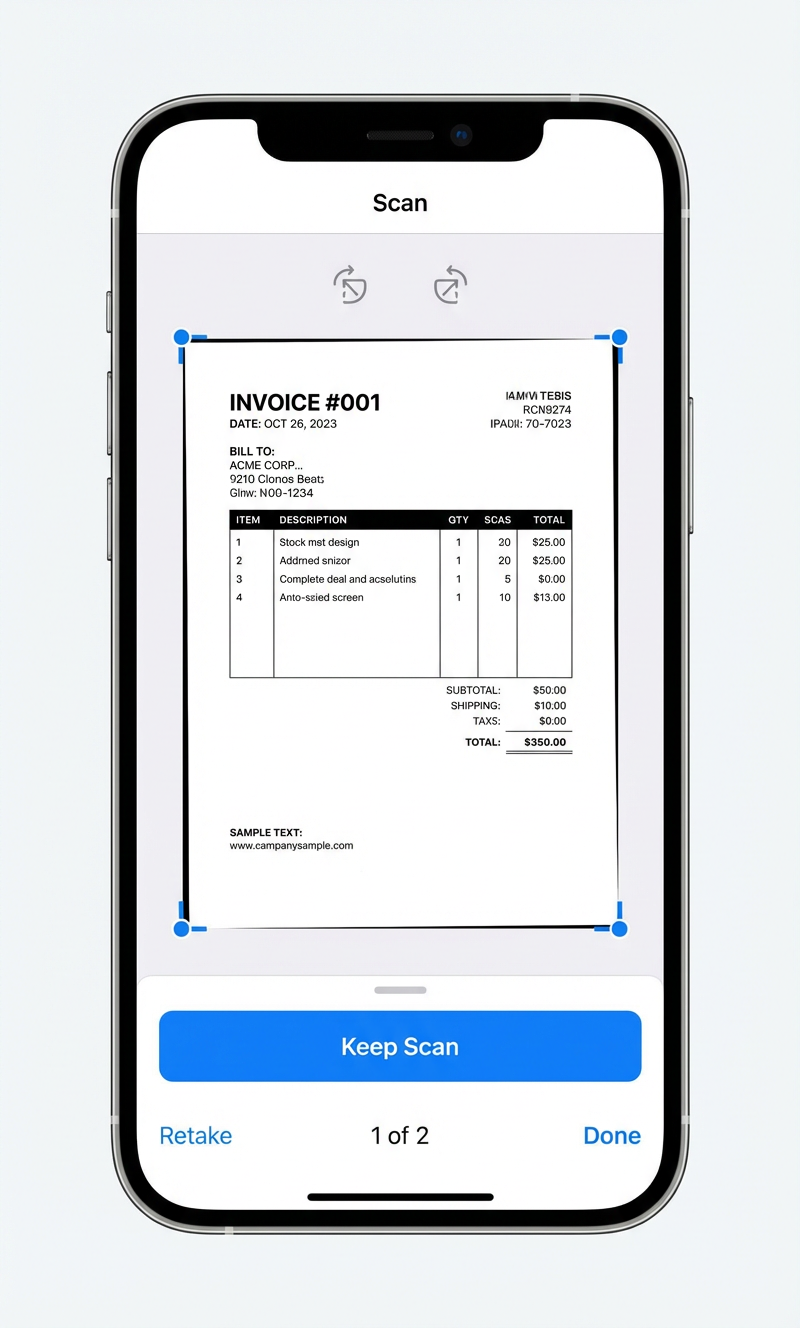
Step 3: Review and adjust each page
After each page is captured, a preview appears. You can drag the corner handles to fine-tune the crop and use the rotate buttons to fix the orientation. Tap Keep Scan to accept the page, or Retake if it is not clear.
- For multi-page documents, keep scanning after each "Keep Scan". Every page is added to the same PDF.
- The counter at the bottom (e.g. "1 of 2") shows how many pages you have captured so far.
- When all pages are scanned, tap Done.
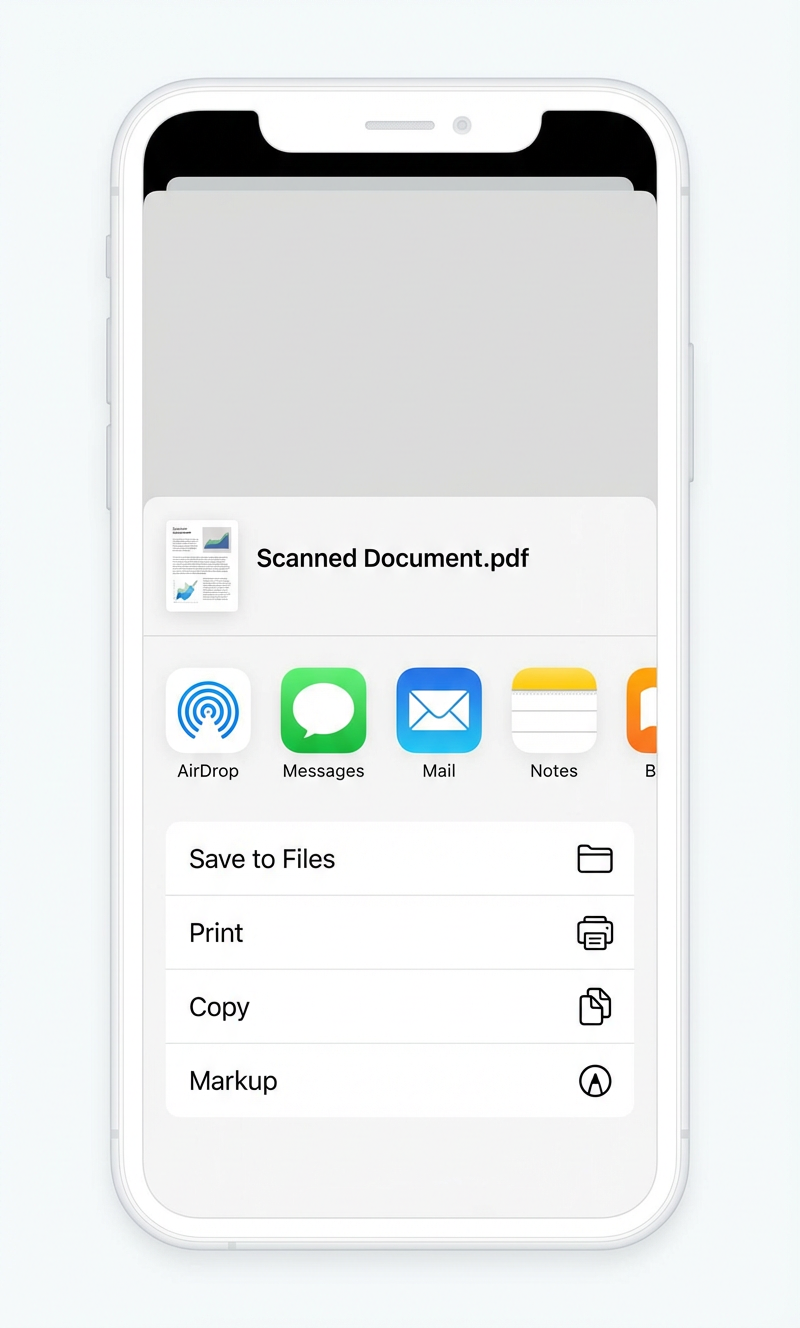
Step 4: Share or save the PDF
The scanned document is now embedded in your note as a PDF. To share or save it:
- Tap the scanned document thumbnail in the note.
- Tap the Share button in the top-right corner.
- From the share sheet you can Save to Files, send via AirDrop, Mail, or Messages, or upload directly to unofax.
Tips for the best scan quality
A little care when scanning prevents problems in the final fax:
- Use a contrasting background: place white paper on a dark surface so the edge detection works reliably.
- Keep the document flat: smooth out any folds or curls. A crumpled page produces shadows that reduce readability.
- Avoid glare: glossy or laminated documents can reflect light. Tilt your phone slightly if you see a bright spot.
- Review before uploading: open the finished PDF and check every page for cropping issues, blur, or missing content.
Ready to send a fax?
Just upload and send — flat rate $0.29 AUD/page to 45+ countries. Free cover sheet, no sign-up needed.
Send a Fax